Project you are the ONE. a Wireless powered fiber optic side glow diffused bling
When I was kid, I was fascinated by the world where Tesla and Edison live in. What intrigued me most was the constant debate of AC and DC (at that time), and Tesla’s vision of having power transmitted wirelessly. No cables necessary, no copper mined unnecessarily and friendly to all humans. Wireless power transfers (inductive charging) at that time are pretty much far fetch idea. Nonetheless, the man himself went tirelessly (and possibly drove penniless) to prove his “thing”. Tesla’s destitute demise contrary to Edison’s prosperous life strikes me really hard. I nearly gave up on the dreams to study engineering; thinking I should be a business man or middle man making the in-between of deals.
While growing up, I did get my stab at making a wireless power transfer kit; reading up various recipes from various sources such as text books, “cook books” from BBS etc. , proving the materials read. At that time, I can’t even differentiate the difference between a normal copper wire and enameled wire. Both look the same to me. Without a master to guide in the field of making wireless power transfer (inductive charging) works; many failures afterwards, I came to a conclusion that probably I am better off hitched to my computer (intel 486).
Recently, while doing some read up on “Qi” the inductive power (wireless charging) standard for smartphones, suddenly I realized this might be the perfect time where the inductive charging technology has matured for end users like me to toy on the idea.
I have this idea of making novelty jewelry for the missus: wearable electronics of some sort with wireless power transfer aka inductive charging. The concept story board goes this way: At a seeming random event, I would have a little girl present her with a nicely decorated box that contains the novelty jewelry I made, with a message asking her to “follow the rabbit”. Hopefully the design of the jewelry would be very tempting such that she would put on straight away. Then a rabbit inspired character would walk pass her and hopefully, she would pick up the subtle message of following the rabbit. While following the rabbit, she will come across a few interesting characters that are staged, and the last character to appear will be me. Naturally, we would reach out to each other. Me, being the techie would have the transmitter end of inductive charging well hidden in my hand, and hook up to a ubiquitous disguised mobile power supply that supplies 12V, 1A.
Out of sudden (it is just a matter of time/distance for the EM fields to resonates between the tx loop and the rx loop), her novelty jewelry will light up and the light intensity grew greater as we are moving closer to touch! YESS! You are the one! Both of us will proclaimed. That’s the perfect time for me to take a knee, standby with a unique marriage proposal ring.
What else? Propose to her!! this engineered piece of art definitely will work. Trust me, I am an engineer.
What else? Propose to her!! this engineered piece of art definitely will work. Trust me, I am an engineer.
Oh waittttttttttttttttttttttttttttttttt…………I don’t have a missus/wife/GF yet.
This instructables assumes the following parts.
1x wireless charging kit. I got one set that is Chinese made at 13USD from aliexpress.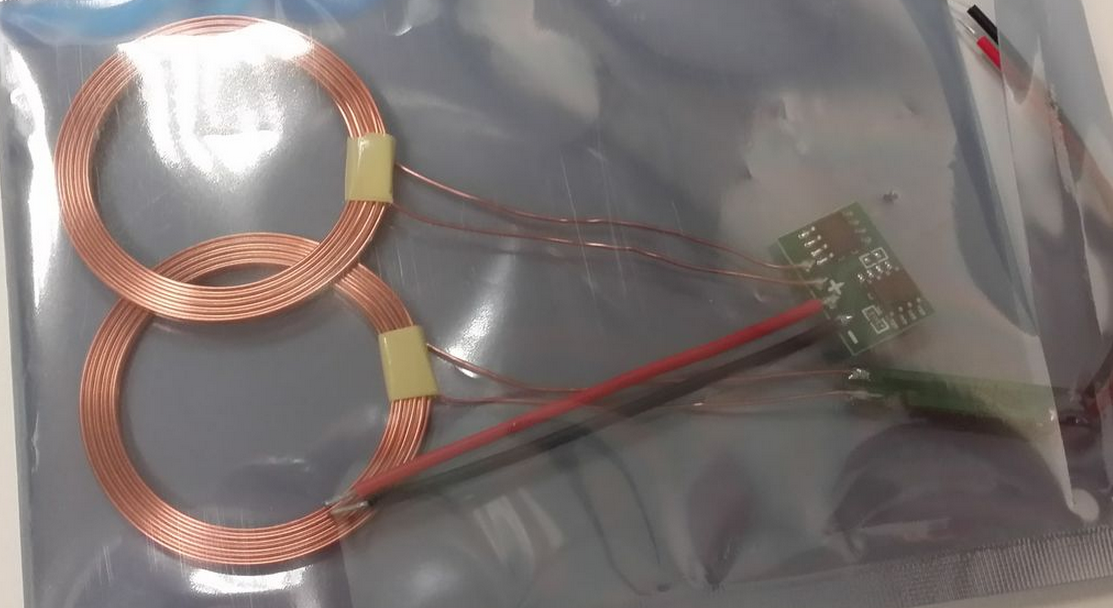
1x apparatus with RGB LED fading PCB of some sort, which consist of a microcontroller such as Arduino or ATTiny85, a RGB LED and a custom PCB or veroboard. A tutorial to program ATTiny85 with Arduino is available and the necessary ATTiny ISP shield can be made too.
There are many derivatives floating on the Internet. I have used my own recipe of ATTiny85 with RGB. The step by step guide of “cooking” a PCB of your own is available here.
There are many derivatives floating on the Internet. I have used my own recipe of ATTiny85 with RGB. The step by step guide of “cooking” a PCB of your own is available here.
1x 5mm side glow fiber optic sufficient to cover the perimeter of the wearable apparatus of choice.
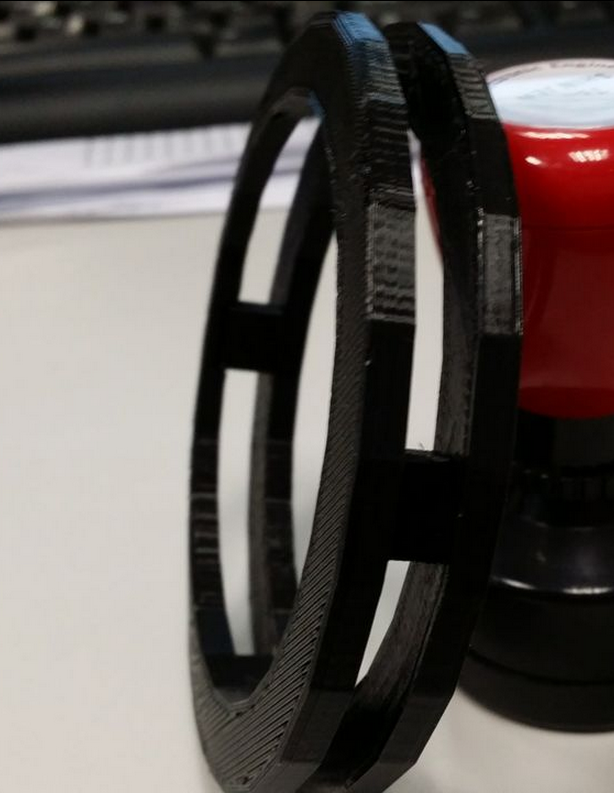
1x 3D printed custom made jewellery to hold the electronics, rx loop, and fiber optic. I have chosen to use a 3D printed bangle. The STL is available here. Print it twice. The two halves are snap fit. It was done in sketchup with the help from xinteng a DCPE yr1.
Step1: Assemble the RGB fading PCB, program the ATtiny 85 and mount it onto the PCB. Fiber optic cable is then inserted into a 5mm heat shrink tube. The contraption is then inserted to the 5mm RGB led.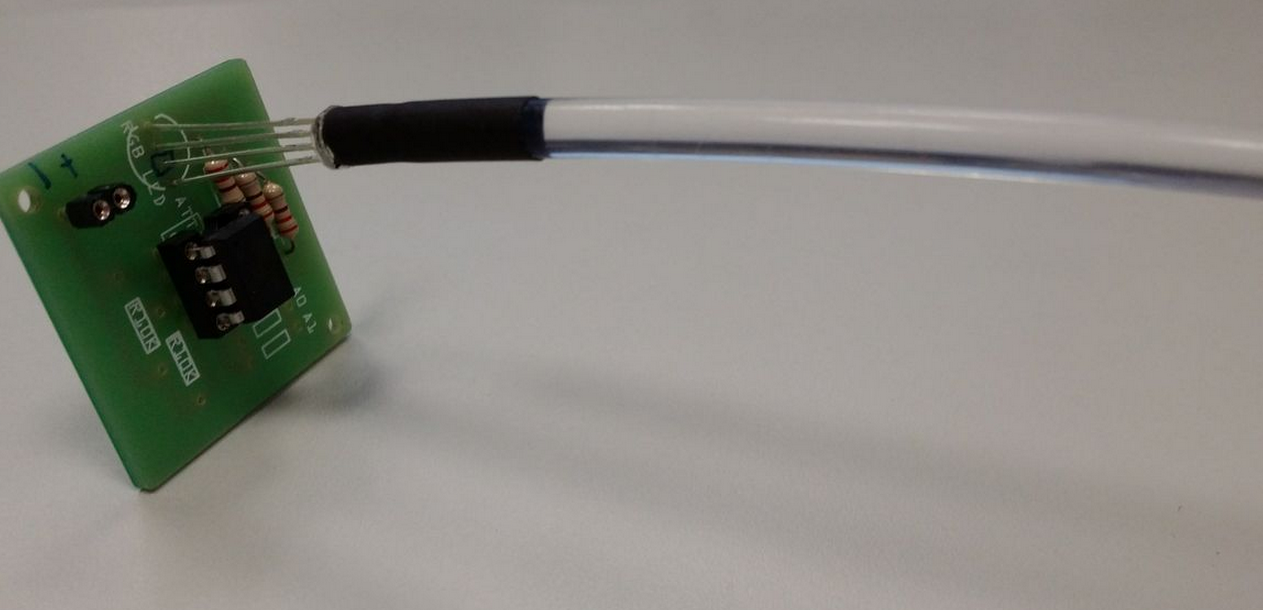
Step2: the assembled contraption in the earlier step is then assembled with the 3D printed bangle. The fiber optic cable are is elastic, and should not be bent at sharp angles. It keep slipping out of the 5mm gap designed to hold it, so I have to resort to cable ties to hold them in place.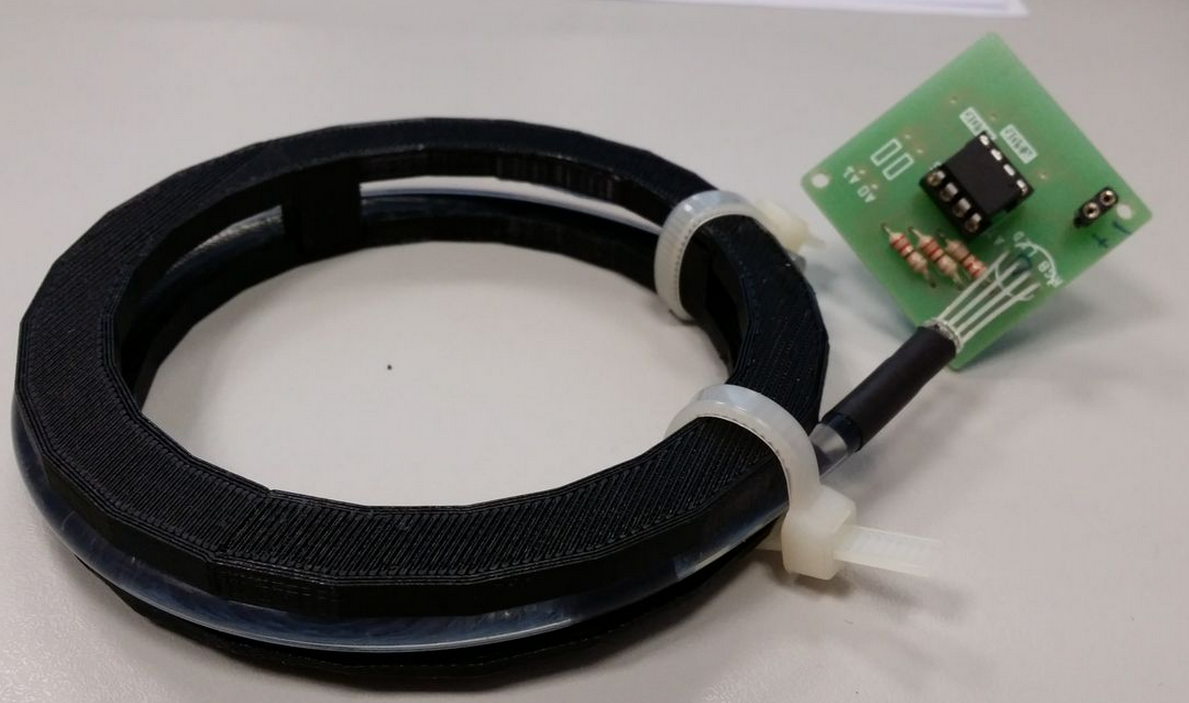
Step3: Test the contraption with 3V battery to test for functionality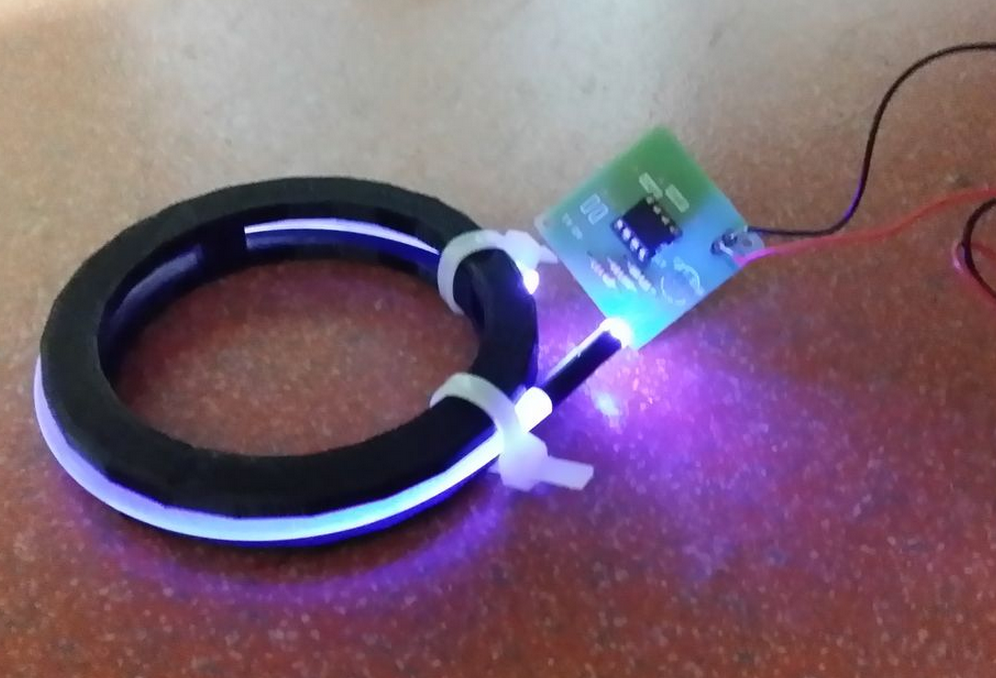
Step4: Assemble the contraption with the RX induction coil and PCB. I have to resort to use some masking tape to keep the wires in place.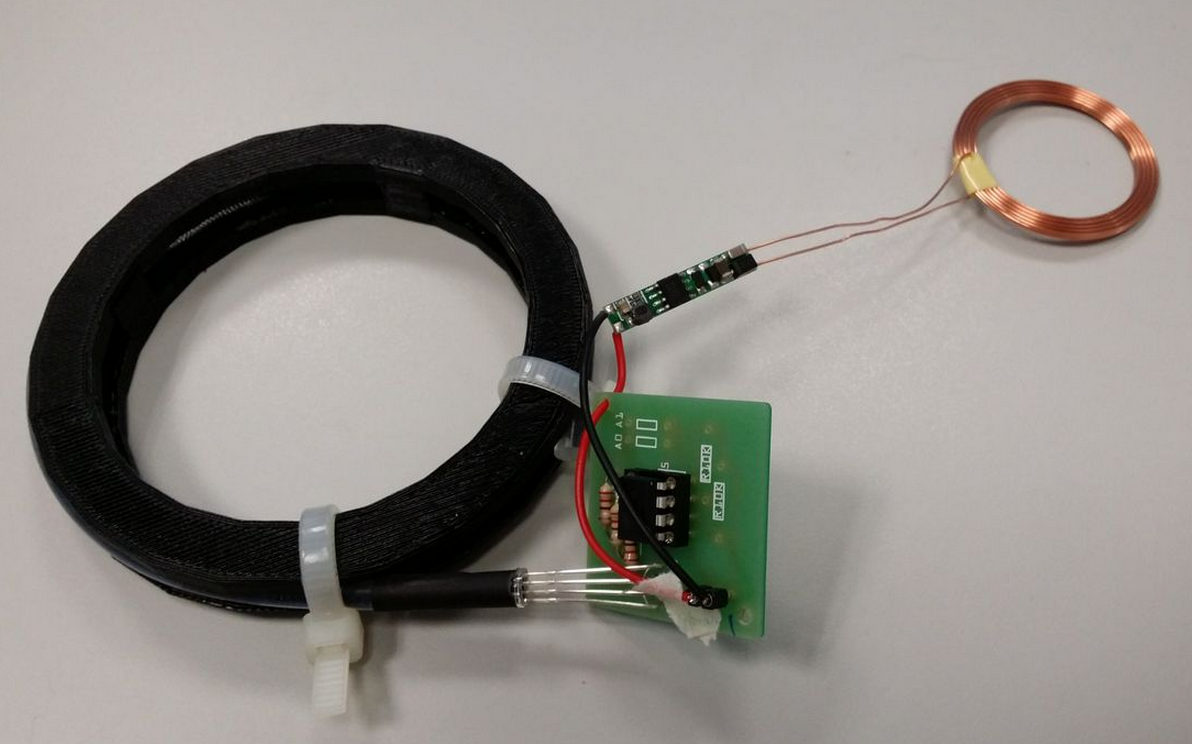
Step5: Test the contraption with TX loop connected to DC power supply. The power supply is set to 12V, 1A.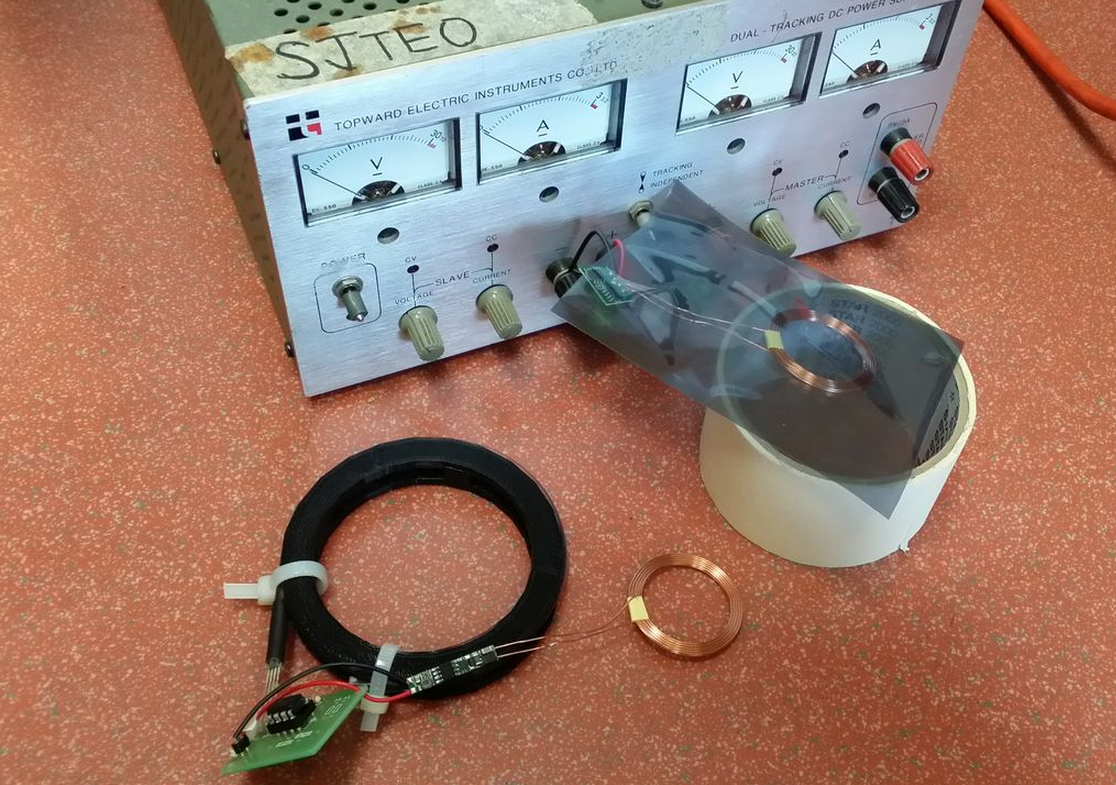
Step5: final check before turning on the DC supply. After turning on the DC supply, observe the behaviour on the EM fields w.r.t to the tx and rx loop. Note: No wireless transfer if the rx and tx loop are orthogonal to each other. The EM fields just cancel each other off.
Look! No batteries needed!
Closeup 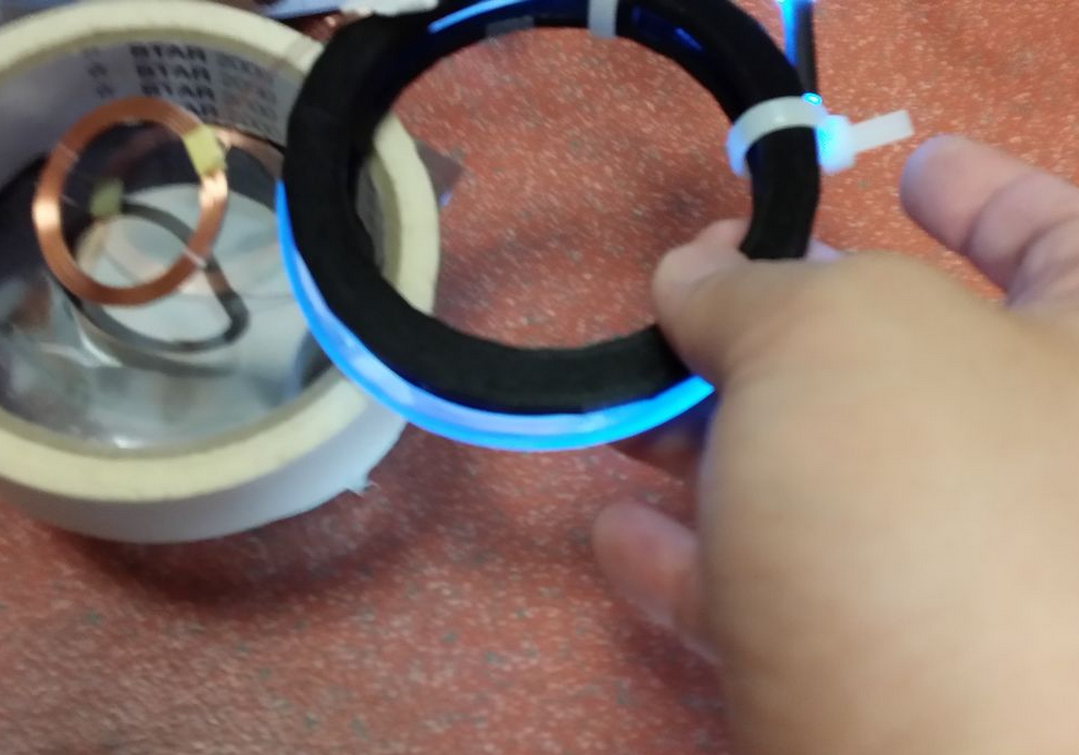
here comes the video

No comments:
Post a Comment